Category: Dessert

Lemon Wreath Cookies & The Great Food Blogger Cookie Swap 2012!!

Have I ever told you that I freakin’ LOVE Christmas?
 
Well, I do.
I love it so much it’s almost a problem….
Almost.

But no one ever seems to complain when I pull out the ol’ recipe book 

& tell them I need them to be guinea pigs for an upcoming cookie swap.
All of a sudden, not so much of a problem, is it?

This year’s occasion for using my friends: The Great Food Blogger Cookie Swap 2012!

The recipe: Lemon Wreath Cookies
The result: Christmas Cookie Tangy Lemon-y Yumminess 🙂

 
Last year I had a great experience taking part in The Great Food Blogger Cookie Swap
so when I got the email saying that it was that time of year again, I jumped at the chance!

It’s pretty cray how big this swap has gotten since last year!
Imagine 575 food bloggers in 8 countries baking hundreds of different types of cookies & clogging up the post offices with delicious baked goods!
But that’s not all…

This year, all 570 bloggers donated to Cookies for Kids’ Cancer and were matched dollar for dollar by OXO (the company that makes those handy kitchen tools) resulting in a donation of $4,300 to aid in the fight against Kids’ Cancer.
Who said baking was a frivolous past-time??


This year I sent cookies to:
Sharon at cheesypennies.blogspot.com
Carolyn at alldayidreamaboutfood.com &
Renee at tortillasandhoney.com
(Don’t forget to check them out & see what they made for the swap!)

My 3 matches sent me the deliciously diverse cookies you see below!

Check out their recipes & blogs at the following links:
Amy Christie at thisheartofmineblog.com
Stacy Lundstedt at bakingbandit.wordpress.com
Valerie at pursuitofsweetness.com
Thanks Ladies!! 
You helped me nullify my diet 3 times 🙂


This year I challenged myself to make something that I had never made before but always wanted to try.
I set to scouring the endless collection of “to-do” recipes I have collected over the years & quickly overwhelmed myself.
10 minutes later, cut to me drinking a glass of red wine in my kitchen…& it hit me!
Who’s the one person that not only completely fills me with fits of jealous rage but also insurmountable amounts of creativity?
Martha friggin’ Stewart.
I’m a big enough woman to admit it…
Oprah has this same effect on me, but she doesn’t make cookies, 
so I’ll leave her out of this.
Anywho,
I went back to my “to-do” list & what do you know?
Sitting on top of the crazy pile I had made on the floor was this recipe for 
Lemon Wreath Cookies.
Kismet.
 
I loved everything about these cookies.
 
I loved the fact that they looked nothing like “cookies”.
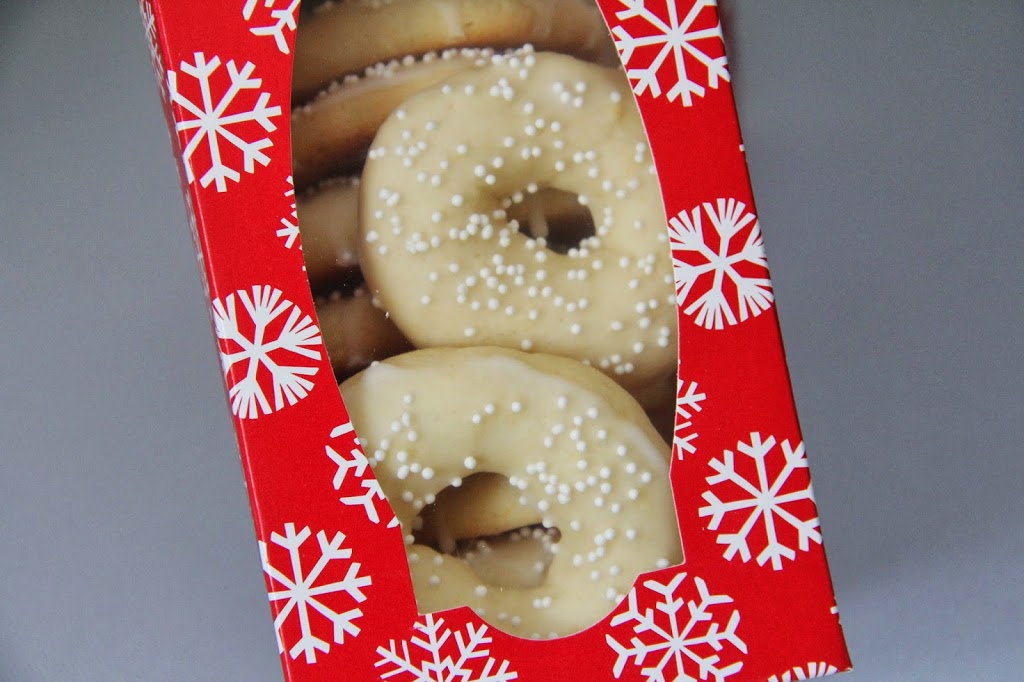
I loved that they looked like little Christmas wreath glazed donuts.
I loved that they had history being based on a traditional Italian cookie called “ciambella“.
So I made them & anxiously awaited my taste-tester’s response.
My guinea pigs approved….
I ate, like, a dozen….
Then I made them again just to make sure they were delicious.
Yup. Still pretty darn delicious….
Martha’s gone and done it again…and I hate her a little more with every bite…
 
And there you have it:
Beautiful & Tart Lemon Wreath Cookies!
You can thank me later…I’ll wait 🙂

Enjoy!

(more…)

2011 Great Food Blogger Cookie Swap: Citrus Alfajores

‘Tis the season…to eat cookies.
Duh.
Well maybe not just eat cookies, but it’s not a bad idea!
So you can imagine my excitement when I came across the posting by
Lyndsay at Love and Olive Oil & Julie at The Little Kitchen about
The 2011 Great Food Blogger Cookie Swap.
The idea: Have several food bloggers from across the United States sign up to take part of the cookie swap (600 to be exact!) have them each bake 3 dozen cookies and send a dozen to 3 other bloggers.
Then sit back, relax, and wait for your very own 3 dozen cookies to arrive at your door!!
I figured:
Hey.
I can bake  
and
I’m pretty good at sitting back  
and
I’m pretty friggin’ spectacular at eating cookies. 
Win. Win. Win.
So I put on my apron, got out my rolling pin and decided on a variation of my absolute favorite cookie: Peruvian Alfajores!

Alfajores are a biscuit-y, slightly sweet wafer/cookie filled with dulce de leche and rolled in powdered sugar.  They are very common in Peru and many other Latin countries with each one having their own variation on the same basic cookie. Growing up, I LOVED when my family would bring these from Peru when they’d visit us.  I have not been able to readily find these in any bakeries so I decided to start making them myself.

But this was the first annual cookie swap.
I couldn’t just make any ol’ alfajor.
It had to be bad ass. It had to be unique.
I had to bring my “A” game.
So here you go:
Citrus Alfajores.

(more…)

Donsuemor Almond Roca Mocha Cake Bites

A couple of months ago, a baker friend of mine Andrea from Sweet Dreamery Desserts tipped me off to this really great opportunity to work with an awesome Southern California baking company called Donsuemor. They were doing a “Dessert-A-Day” campaign and wanted foodie bloggers to get creative with their products.
I jumped all over that.
 
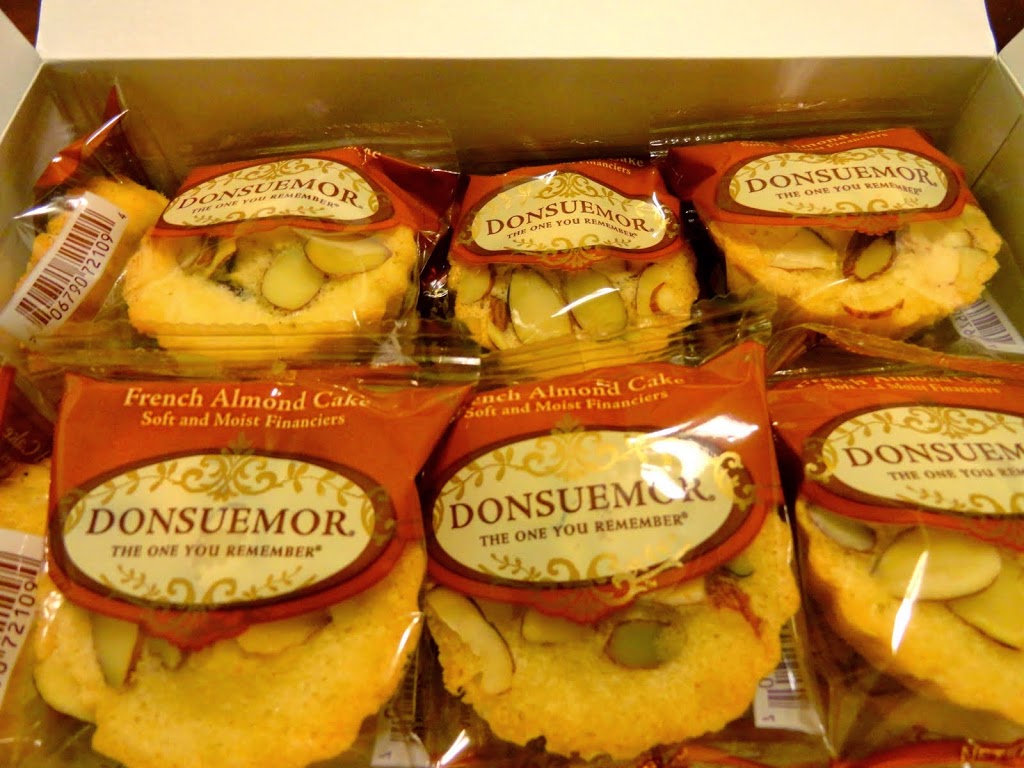
As I searched their website, I found their French Almond Cakes and they spoke to me…not like schizo spoke to me but nonetheless, I had to have them.  One week later there was my very own box of Almond Cakes sitting on my doorstep! There’s just something about getting packages that makes me all tingly inside but that’s a whole other story. So here I am, geared up and ready to make something scrumptiously awesome and unique…aaand…

I drew a blank.
I had nothin’.
Except anger. Yeah, I had lots of that.
And as much as I am embarrassed to admit this, I got so frustrated that I was coming up with absolutely nothing that I smushed the cake between my fingers and BAM!
It came to me…
CAKE POPS.
There was only one little problem with this grand idea of mine.
I’ve kind of got a thing against cake pops…I know it’s irrational…but I just don’t like the looks of ’em.
I glare at them in their case at Starbucks…looking all smug…just sitting there…on a stick. 
 
I refused to let my disdain of cake pops hinder my creative epiphany so, like any good archenemy, I got to know my nemesis.  I learned a little about how they came to be (Bakerella may have invented them, she may have not. My google venture was unsuccessful about getting to the bottom of that ol’ mystery so I digress). I learned how they were made and how to decorate these little buggers…snotty buggers…but I digress…
 
I can’t say I was sold on the whole cake pop thing but knowledge is power, the more you know, the more you grow, and so on and so on so I took this challenge by the horns and decided to wrestle with the beast itself. 
 
So here we go, Cake Pops. 
I’ve come to chew gum and kick butt and I’m all outta bubblegum. 
Let’s do this.
 
These are the Donsuemor French Almond Cakes that stumped me. Buttery, yummy, and nutty!
I added a little coffee to the frosting to give it a mocha twist. Almond cake begs for coffee. 
No really, I think I heard it say “coffeeeeee”.  Weird, right??
A lot nicer depiction of my initial mashing of the cake as I flew into a mental-block fueled rage…well maybe not a rage…more like a fit.  Yes. A fit. I’ll go with that.
Mocha Fudgy Buttercream Frosting. Yummy.
 
Ok. 
This is where I start to lose it a little. 
This is what the cake crumble and frosting looks like once they’re mixed together…
uh huh…
I’m a little weirded out by all this but highly determined to see this through…
A melonballer and some patience and I’m feeling better about these little guys…
FACT: I enjoyed stabbing this cake ball with a stick. Don’t judge me.
FACT: The cake pop got me back. Hardcore. 
Apparently I missed the part where my directions said be careful not to make them too big or the weight will make them slide down the stick. 
Fatty cake!
So a natural evolution is…CAKE BITES! 
But I’m not giving up on this one…I will be back Cake Pops…
and I will OWN you.
Came out rather nice, if I do say so myself…and I do.
Enjoy!
I made them, just for you!!
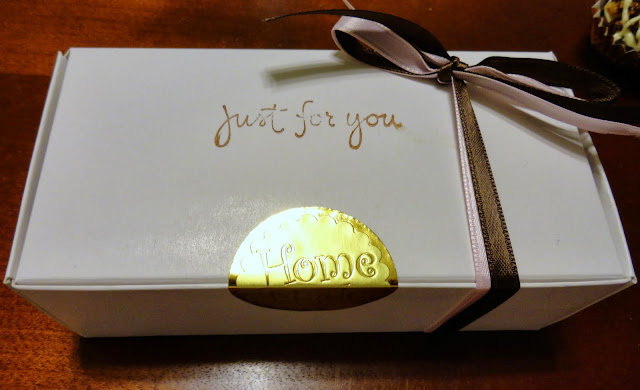
 

Donsuemor Almond Roca Mocha Cake Bites

Prep Time: 2 hours, 30 minutes

Total Time: 3 hours

Yield: 50-60 1 inch cake pops/bites

Donsuemor Almond Roca Mocha Cake Bites

Ingredients

    Cake:
  • 20 Donsuemor French Almond Cakes, crumbled
  • Mocha Frosting:
  • 1 cup unsalted butter
  • 1 1/2 cups confectioner's sugar (add more/less to taste)
  • 2 Tbsp coffee-strongly brewed (can use instant/espresso/or fresh made)
  • 3 Tbsp cocoa powder
  • Topping:
  • 1 14 oz package of Wilton Light Chocolate Candy Melts
  • 6 Almond Roca candies, crushed/chopped
  • 2 oz melted white chocolate
  • Materials:
  • mini cupcake liners
  • lollipop sticks (if you so wish...but...I won't go there.)
  • Wax paper

Instructions

  1. 1. Crumble cakes by hand in large bowl. Put aside.
  2. 2. Prepare frosting by creaming butter with mixer. Add cocoa powder and mix. Slowly add coffee being careful not to add too much or the consistency will be off. Slowly add confectioner's sugar 1/2 cup at a time until desired consistency/sweetness is reached.
  3. 3. Place frosting in bowl with cake in small amounts until desired consistency is reached. DO NOT ADD ALL THE FROSTING AT ONCE!! IT MAY BE TOO MUCH AND YOU WILL END UP WITH MUSH. YUCK.
  4. 4. Mix the cake and crumble with frosting. Some people use their hands. I don't. It's skeeves me out. May be placed in refrigerator for easier scooping.
  5. 5. Using a melonballer, scoop out even sized rounds and smooth out by rolling dough into balls with hands.
  6. 6. Place cake balls on wax paper and refrigerate for at least 2 hours. Can be frozen.
  7. 7. Melt candy according to package directions. If you find that this is too thick for you, you can add 2 tablespoons of shortening to chocolate.
  8. 8. If you are making cake pops, stick lollipop sticks into base of cakes and dip into chocolate, shaking off excess and place on wax paper to set. If you are making cake bites, place cakes into chocolate, removing with a fork, shaking off excess and sliding onto wax paper using a knife/toothpick.
  9. 9. Before chocolate sets place small amount of crushed candies on top of bites or dip/roll pops in candies.
  10. 10. Once chocolate has become slightly hardened, drizzle white chocolate over bites/pops. I melted the chocolate in a ziplock bag in the microwave for 1 minute then snipped the end off and used that as a piping bag. Nifty AND thrifty.
  11. 11. Bites/pops may be frozen but do not refrigerate. They may sweat and become moist.
https://patriciaspatticakes.com/2011/09/donsuemor-almond-roca-mocha-cake-bites-html/

Pan Dulce & Carbs = Love

 
I don’t trust people who don’t eat carbs. 
There. I said it.
 
Don’t ask why, it’s just something innate in me that screams, “they are hiding something!”.  
 
My guess?  It’s probably like, 50 Twinkies in their nightstand, but who am I to judge?
 
Where does this distrust of the carb-less stem from, you may ask?   
Well, in case you didn’t know it, I’m the child of foreigners and therefore, I grew up eating a WHOLE LOT OF CARBS.  
Maybe this fact hardwired my brain to equate family=love=trust=carbs. 
 
Every morning started off with bread, butter, and some kind of deli meat.
 
No oatmeal for me, thanks.  Just butter sandwiches.
 
Every night ended…well, pretty much how it started…with more bread.
 
My friends thought I was weird.
I mean what 10 year old drinks café con leche and eats sweet bread rolls at 10pm before bedtime??
 
But that was my childhood, and as of late, I’ve been yearning to get back to that place. 
So when the opportunity to bake pan dulce (or sweet bread) with my Argentine friends’ mom came up, I was all over that.   
Never mind that it was 90 degrees in L.A. that day… 
I was going to bake with Mi Vieja, and no one was going to stop me. 
 
Bwahahaha!!!
 
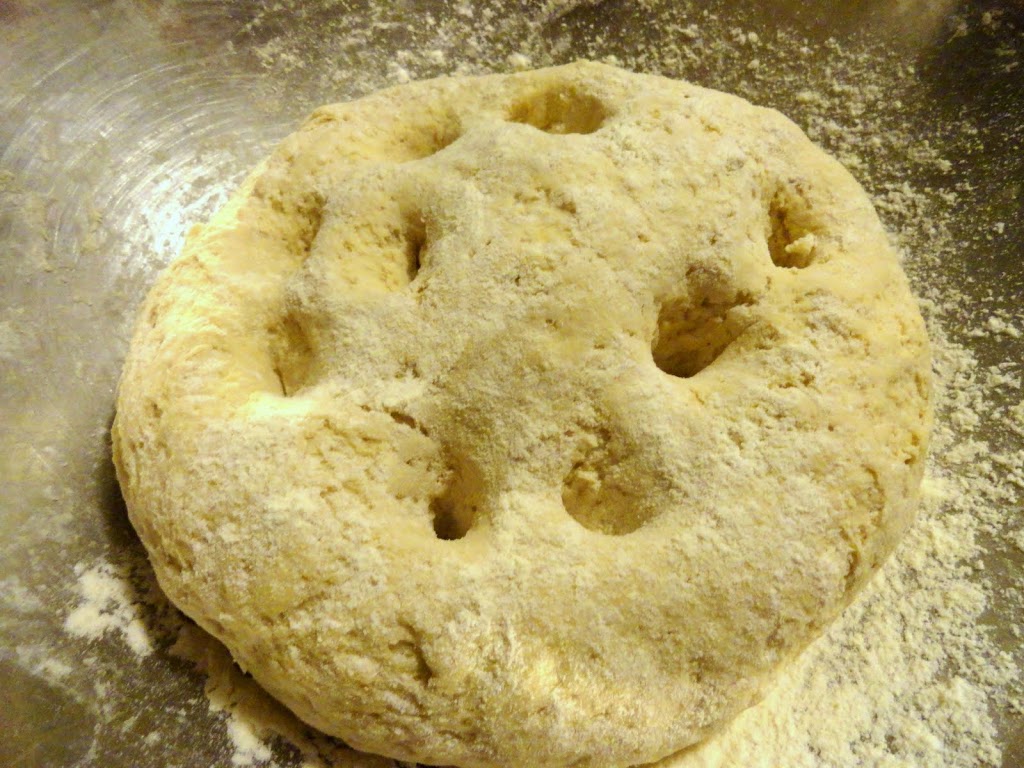
Um, sorry. Got carried away…here’s how it went down :)I started my pan dulce using what is called a “Masa Madre” or “starter dough”. It is used as a pre-fermenter for bread recipes.  
Whether this translation is completely correct or not, I’m not sure, but it’s the closest thing I could find when I Googled it. 
I Google everything. I’m a Googler. 
Oh my gosh, I just annoyed myself. 
Yikes.
So this is my Masa Madre. 
She’s a sexy mama.
 Masa Madre is a dough that is used to start a number of bread recipes & creates a greater complexity of flavor for your bread.  I love the idea of sourdough starters. I recently did my research on masa madre, and found out that it can be kept throughout generations (as long as it is kept “fed” w/ daily additions of flour and water). I love the idea of passing my dough on to my family members, children, and loved ones. I love it so much, in fact, I think I will write a whole other blog entry on it. Until then, you can read about it on wikipedia HERE!
 
Once the Masa Madre has risen and kneaded, a small portion of the Masa is then added to the mixture to create the final dough.
 
I think watching dough rise and double is MAGIC
It makes me “oooh” and “ahhh” everytime 🙂
 Out of the oven, and ready for the good stuff!
 
 
Stuff them with dulce de leche, dress them up with a little powdered sugar, and bada-boom-bada-bing, there you have Miguelitos!
 

Pan Dulce & Carbs = Love

Prep Time: 12 hours, 30 minutes

Cook Time: 10 minutes

Yield: 50 Miguelito Rolls

Pan Dulce & Carbs = Love

Ingredients

    Masa Madre:
  • 2 cups warm water
  • 1 kilo of all bread flour
  • 50 grams of rapid rise yeast
  • Miguelitos:
  • 2 lbs bread flour
  • 50 grams rapid rise yeast
  • 1/2 Tbsp salt
  • 1 cup butter, unsalted
  • 1 1/4 cup sugar
  • 1 tsp vanilla extract
  • 3 large eggs
  • 2 cups warm water
  • 1 cup (200 grams) of Masa Madre from above recipe
  • 1 beaten egg for egg wash
  • 1 jar of dulce de leche
  • powdered sugar for dusting

Instructions

    To Make Masa Madre:
  1. 1. Mix all ingredients together in a large bowl until well incorporated.
  2. 2. Knead dough until it forms a silky-textured dough.
  3. 3. When it increases to 25% of original size, place dough in a Ziploc bag and refrigerate.
  4. 4.The dough will be ready to use in about 12-15 hours.
  5. To Make Miguelitos:
  6. Preheat oven to 425 F
  7. 1. Mix all ingredients together adding water gradually until just moist enough that it forms a silky-textured dough (it will resemble pizza dough).
  8. 2. Cover dough with saran wrap and let it rest 15 minutes.
  9. 3. Using about 50 grams of dough (about the size of a medium egg), make round balls and place on a greased cookie sheet approximately 2 inches apart.
  10. 4. Brush tops of dough with egg wash, cover with saran wrap, and allow to rise to double or triple their original size (approximately 15 minutes).
  11. 5. Bake bread for about 10 minutes or until golden brown.
  12. 6. Remove from oven, and once cooled make a diagonal slice in the tops of the sweet rolls and using a small teaspoon, stuff the rolls with dulce de leche.
  13. 7. Dust with powdered sugar and enjoy!!
https://patriciaspatticakes.com/2011/07/pan-dulce-carbs-love-html/

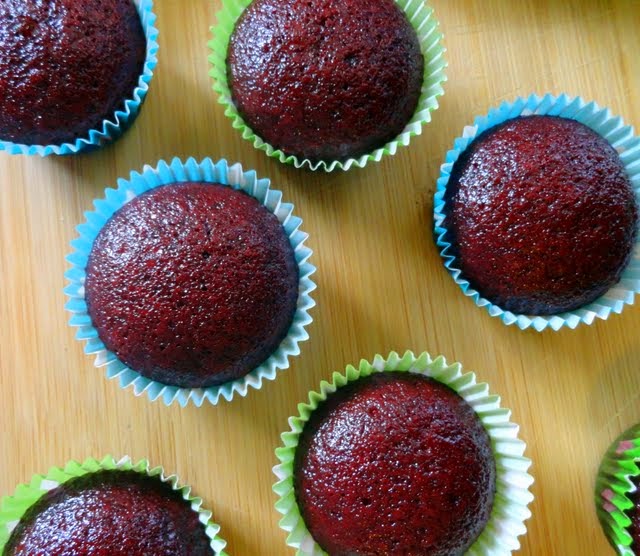
Red Velvet Mini Cupcakes with Smooth Cream Cheese Frosting

Red Velvet seems to be all the rage these days.
I like them because they are incognito chocolate cakes.
Sneaky little goodies.
That being said: I’ve got a bone to pick with these cupcakes.
I don’t really make mini cupcakes because, well, I’m not really sure what to do with them.
I’m unsure how to frost them.  
Their baking time makes me nervous.  
They give me the stink eye when I transport them across town and threaten me with tipping over every time I make a turn.
Mini cupcakes have attitude and I don’t appreciate it.  
But those little things are so darn cute…and I give in and they win.
Every. Time.
*Sigh*So now that I have admitted defeat, I can start talking about more important things.

For instance, the fact that I may just be in love with my new camera. 
Waaaay better than a camera phone!!
I think this works…but I need more… 
Ahhh…there ya go…now that’s what I’m talking about…
 Wait, wait right there. What’s this?? Oh. It’s awesome. That’s what. 
Y’know. No big whoop.
FYI 
In My Kitchen:
 
Ha Ha. Enjoy!!

Red Velvet Mini Cupcakes with Smooth Cream Cheese Frosting

Prep Time: 20 minutes

Cook Time: 10 minutes

Total Time: 30 minutes

Yield: 12 standard cupcakes or 24 mini cupcakes

Red Velvet Mini Cupcakes with Smooth Cream Cheese Frosting

Ingredients

    Cupcake Ingredients:
  • 1 1/4 c. all-purpose flour
  • 1/4 c. baker's sugar (superfine)
  • 1/2 tsp baking soda
  • 1/2 tsp salt
  • 1/4 c. unsweetened cocoa powder
  • 1/4 c. vegetable oil
  • 1 1/2 c. buttermilk, room temperature
  • 1 large egg, room temperature
  • 1 Tbsp. red food coloring (or more depending on how deep red you like your cake)
  • 1/2 tsp white distilled vinegar
  • 1 1/2 tsp vanilla extract
  • Cream Cheese Frosting Ingredients:
  • 4 oz unsalted butter, room temperature
  • 4 oz cream cheese, room temperature
  • 2 c. powdered sugar
  • 1 tsp vanilla extract

Instructions

  1. Preheat oven to 350 F.
  2. In a bowl, sift together cocoa powder, flour, sugar, salt, and baking soda.
  3. In another bowl (or mixing bowl of standing mixer), gently beat together egg, buttermilk, oil, vinegar, food coloring, and vanilla using a paddle attachment or hand mixer.
  4. Slowly add the dry ingredients to the wet and mix until smooth and blended well. Be careful to not over mix.
  5. Divide batter evenly among cupcake tins (about 2/3 full) and bake for about 8-10 minutes or until a toothpick inserted in the center comes out clean.
  6. Remove from oven and cool on a rack before frosting.
  7. To prepare frosting, in a mixing bowl (with paddle attachment or using a hand mixer), beat together butter and cream cheese until well combined.
  8. With the mixer on low speed, add the powdered sugar a cup at a time until smooth and creamy.
  9. Beat in the vanilla extract.
https://patriciaspatticakes.com/2011/06/red-velvet-mini-cupcakes-with-smooth-cream-cheese-frosting-html/